
Docker for Node.js: How to Containerize Apps Safely
 Reza Khosravi
Table of Contents
Your service runs on your laptop. A teammate pulls the image, gets a different Node.js patch, and a native module fails. Or the deploy works, but the container ignores the termination signal and drops requests during every rollout. That's the gap with most Docker for Node.js setups. They solve packaging, then stop before the operational contract changes. A production container needs a reproducible build, a base image you can update on a schedule, a hardened runtime, and shutdown behavior you've tested.
Write a Production Dockerfile in Eight Steps
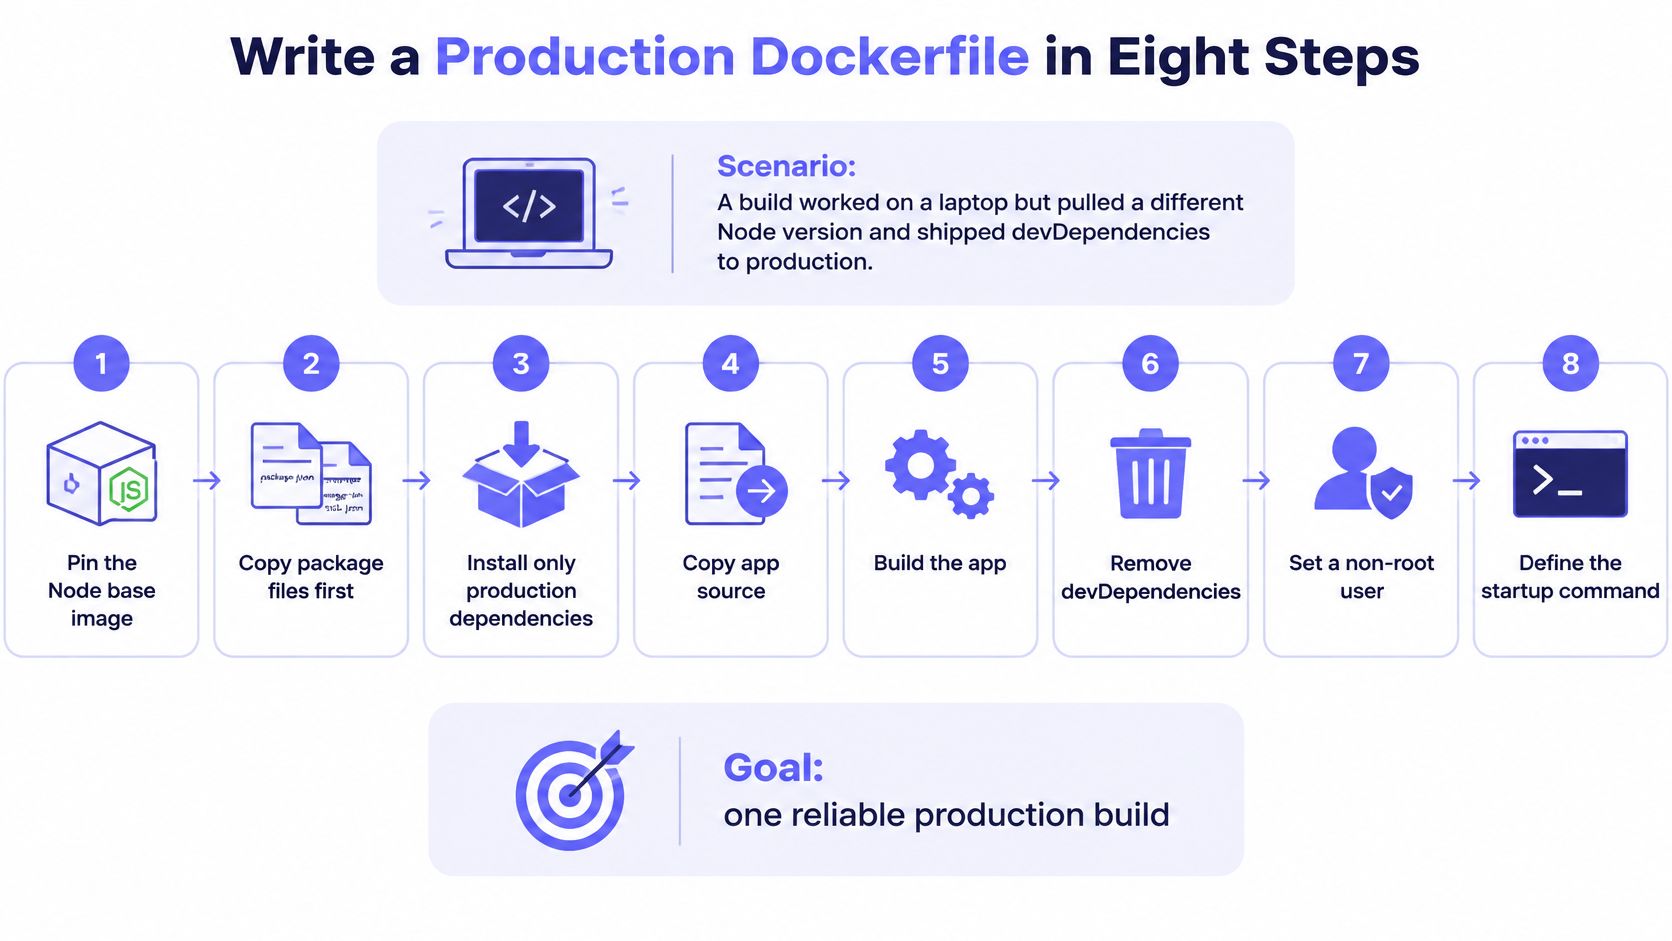
Say a build worked on a laptop but pulled a different Node version in CI and shipped devDependencies to production. Tests passed locally, then the image carried a test runner, a compiler, and a runtime nobody had approved. A good Dockerfile has one goal. It gives the same result tomorrow and ships no development tooling.
The sequence below follows the pattern in the OWASP NodeJS Docker Cheat Sheet, which recommends small images, digest pinning, npm ci --omit=dev, multi-stage builds, and non-root execution. Treat it as a deterministic pipeline, not a list of optional tweaks.
Build in This Order
Pin the base image by digest. Use
FROM node:22-slim@sha256:...rather thanlatestor a floating tag. A tag can move. A digest can't, so two builds weeks apart start from identical bytes.Set the working directory.
WORKDIR /appgives every laterCOPYandRUNa predictable home. It also stops application files landing in the filesystem root by accident.Copy only the manifests first. Copy
package.jsonandpackage-lock.jsonbefore any source. Docker can then reuse the dependency layer while application code changes underneath it.Install with
npm ciin a builder stage. Unlikenpm install,npm ciinstalls exactly what the lockfile describes and fails whenpackage.jsonand the lockfile disagree. That failure is useful. It catches a missing lockfile commit in CI instead of at runtime.Compile native modules in the builder. Build tools, Python, and compilers belong in the builder stage where bcrypt, sharp, or canvas get compiled. The runtime stage shouldn't carry a toolchain an attacker could use.
Install production dependencies only. In the runtime stage, run
npm ci --omit=dev, or copy a finished build artifact across. Either way, linters and test frameworks stay out of the shipped image and out of its vulnerability scan.Set the environment and user. Set
NODE_ENV=productionso frameworks disable development behavior and verbose error output. Then setUSER nodeto run as the supplied unprivileged user instead of root.Copy source last and use the exec form. Copy application code after dependencies, then finish with
CMD ["node", "server.js"]. The exec form makes Node the main process, so it receives SIGTERM directly from the orchestrator.
Pairing this Dockerfile with broader Node.js best practices keeps the packaging rules aligned with the code rules your team already reviews.
The Mistake That Wastes Every Build
Practical rule: If a one-line code change triggers a full dependency reinstall, your layer order is wrong.
Copying the whole source tree before the manifests is the most common error. Every edit changes that layer, Docker invalidates everything after it, and npm ci runs from scratch on each build. Move the manifests earlier and the source later.
Test it directly. Build once, change one line of application code, and rebuild. The dependency step should show as cached, and only the source layer should rebuild. If it doesn't, the order is still wrong.
Choosing a Base Image and Its Trade-Offs
Start with slim. Move to Alpine only after your full dependency graph builds and passes tests on musl. Move to distroless only when your team can debug without a shell. That rule covers most services, and the table shows why.
| Base image | Approx. size | C library | Native addon risk | Best fit |
|---|---|---|---|---|
| node:lts (full Debian) | roughly 1 GB | glibc | Low | Build stages and tooling-heavy apps |
| node:lts-slim (Debian slim) | roughly 220 MB | glibc | Low | Default for most production apps |
| node:lts-alpine | roughly 130 MB | musl | Medium, test native builds | Pure JavaScript apps with small footprints |
| Distroless Node.js | roughly 180 MB | glibc | Low | Hardened runtime stage where no shell is needed |
Sizes shift with each Node.js release, so check your own tag with docker images rather than trusting any published figure, including this one. Size is also the weakest of these criteria. Compatibility decides whether the service starts at all.
Where Alpine Costs You
Alpine uses musl instead of glibc. Pure JavaScript packages don't care. Native addons do. A prebuilt binary compiled against glibc may refuse to load on Alpine, forcing a source compile that needs python3, make, and g++ in the builder, or failing outright on packages such as bcrypt, sharp, or canvas.
When that happens, teams often add build tools to the Alpine image until it's no smaller than slim, while keeping the compatibility risk. If your dependency graph includes native modules, I would take slim and skip that detour. Choose Alpine when you've proven the graph is clean, not because it's the default in a tutorial.
Where Distroless Costs You
Distroless images ship the runtime and your application, with no shell, no package manager, and no ls. That's a real security gain. It's also a debugging constraint, because docker exec gives you nothing to run.
Plan for that before you switch. Use an ephemeral debug container attached to the same namespaces, or rely on structured logs and metrics alone. If your on-call routine still starts with shelling into a box, distroless will slow the first incident down.
This choice carries weight because the official image is a shared control point. The Node.js community's docker-node repository publishes the official image, which reached more than 1 billion Docker Hub downloads by May 2022. Count those as pulls showing ecosystem reach, not as one billion production deployments. Pick an LTS line, record which variant you chose, and make changing it a reviewed decision.
Pinning Digests and Scheduling Rebuilds
Pinning a digest solves one problem and creates another. The build becomes reproducible, but the base image freezes. Nothing updates it until someone or something changes the digest, so a base with a known vulnerability can stay in production for months while every build reports success.
Say a team pins node:22-slim by digest in January and feels done. Node ships security patches through the year, and Debian patches its own libraries. The service keeps rebuilding the same January base, faithfully reproducing a vulnerable runtime. Determinism without a refresh process is just well-organized staleness.
Automate the Update Path
Let a dependency bot do the mechanical work. Tools such as Renovate or Dependabot watch the base image and open a pull request when the digest for your tag changes. The pull request shows the new digest, triggers your normal test suite, and gives a reviewer something concrete to approve.
- Bot-driven digest pull requests. Every base change arrives as a diff, not a silent rebuild.
- A weekly scheduled rebuild. Rebuild even when nothing changed, so a fresh scan runs against current vulnerability data.
- A rebuild on each LTS patch release. A new Node.js patch is a trigger on its own, not something that waits for the weekly slot.
A digest you never update is not a security control. It's a snapshot of the day you stopped checking.
Record One Policy Per Service
Write the refresh policy into the repository, next to the Dockerfile. Keep it short enough that someone reads it during review.
- Node.js LTS line in use. For example, 22.x, with a date for evaluating the next LTS.
- Current base image digest. The exact value in the
FROMline. - Native-module compatibility result. Which addons were built and tested, and on which C library.
- Latest vulnerability scan result. Date, tool, and the highest severity accepted.
- Named refresh owner. One person or team who approves base updates.
Add response targets so the owner knows what good looks like. For example, critical base patches merged and rebuilt within seven days, high-severity patches within thirty days. Those numbers are a policy choice you set, not a standard imposed on you.
For regulated teams, the record is the point. When an auditor asks which runtime shipped on a given date, you can trace the digest through pull requests to a deployment. Without it, you're reconstructing history from registry timestamps and memory. I'd rather maintain a five-line file than do that archaeology during an audit.
Hardening the Image and the Container Runtime
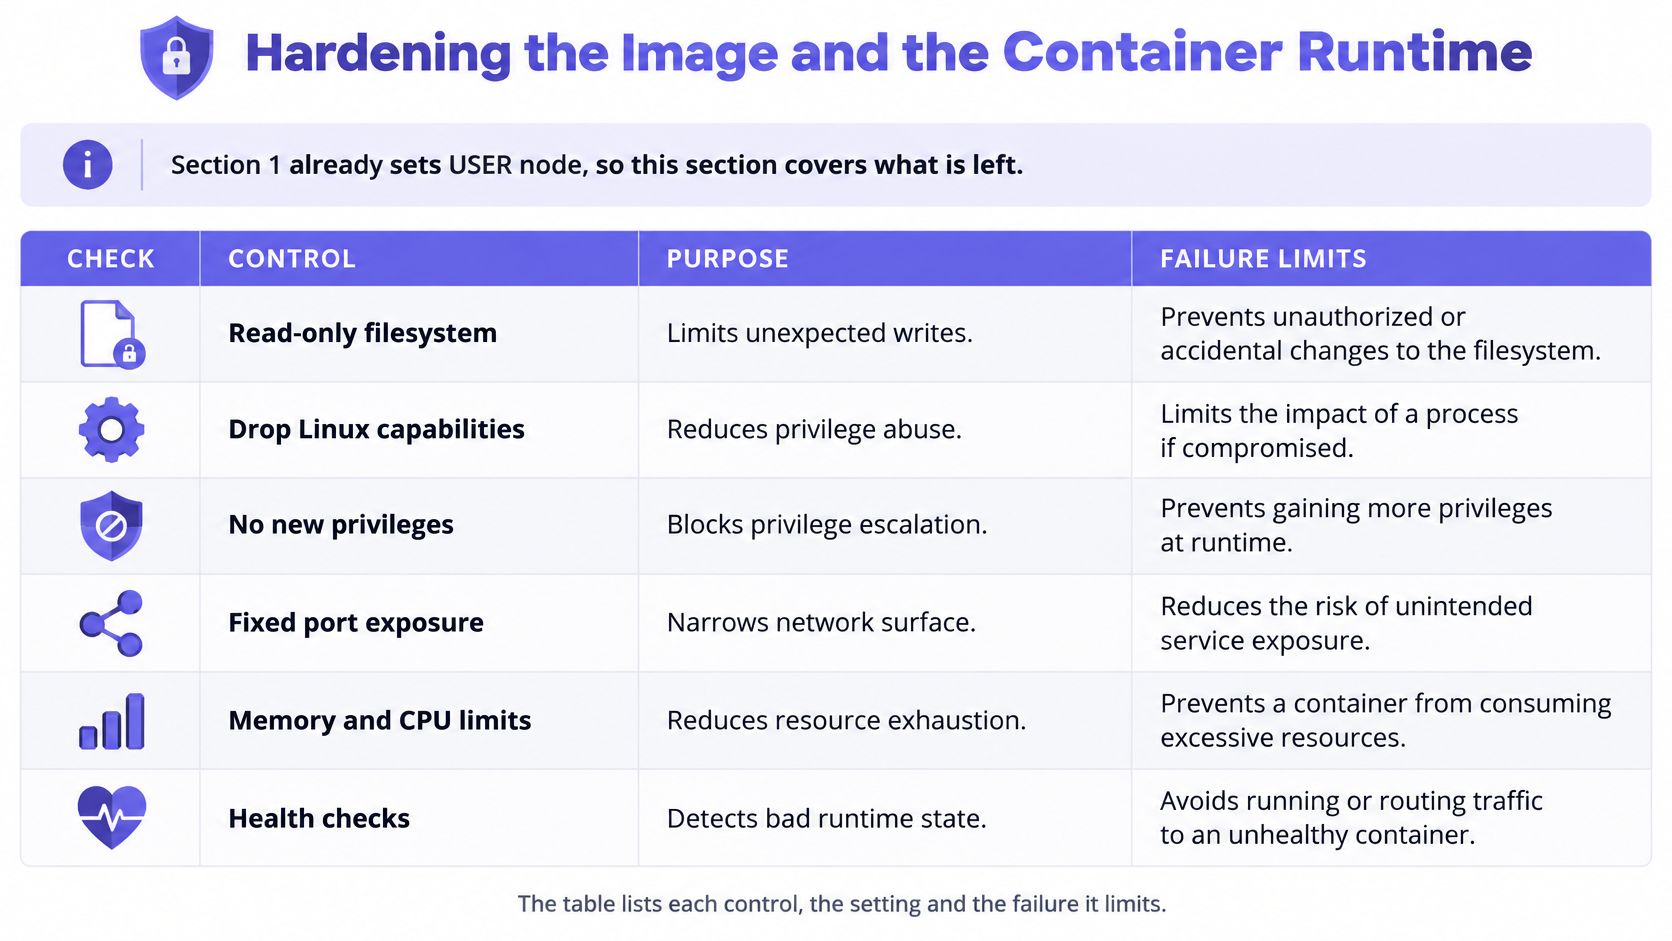
Step 7 already sets USER node, so this covers what remains. Image hardening decides what's inside the artifact. Runtime hardening decides what that artifact is allowed to do once it starts. You need both, because neither compensates fully for the other.
Keep Secrets Out of Layers
The most common real incident here is boring. Someone copies the project directory, a .env file or an npm token lands in a layer, and a later instruction deletes it. The file is gone from the final filesystem but still present in image history, readable by anyone who can pull the image.
Two controls stop that. Use RUN --mount=type=secret in BuildKit so a token is available during a build step without being written into a layer. Then add a .dockerignore that excludes .env, .git, and local node_modules, so those files never enter the build context in the first place.
| Control | Setting or command | Risk it limits |
|---|---|---|
| Non-root user | USER node | Full root access after a container escape |
| Read-only root filesystem | docker run --read-only with tmpfs for /tmp | Malware persisting inside the container |
| Secrets kept out of layers | RUN --mount=type=secret | Credentials stored in image history |
| Minimal build context | .dockerignore excluding .env, .git, node_modules | Leaked local files and tokens |
| Dropped Linux capabilities | --cap-drop=ALL | Privileged operations from a compromised process |
| No privilege escalation | --security-opt=no-new-privileges | Setuid binaries gaining root |
| Image scanning gate | Trivy or Docker Scout step in CI that fails on critical findings | Known CVEs shipping to production |
Constrain the Running Container
Run with --read-only and mount a tmpfs at /tmp for the scratch space Node.js and its dependencies expect. A compromised process then can't write a payload into the application directory and execute it later.
Drop Linux capabilities with --cap-drop=ALL, and add --security-opt=no-new-privileges so setuid binaries can't raise the process back to root. Most Node.js services need no capabilities at all, since binding to ports above 1024 requires none. If yours breaks, add back only the specific capability it needs and document why. In Kubernetes, these settings map directly onto the fields described in our guide to security context in Kubernetes.
Don't assume a small image is a safe image. A slim base reduces the number of packages that can carry a vulnerability, but it says nothing about the packages that remain, or about your own dependency tree. Scan the final image on every build and fail the pipeline on critical findings. That gate matters more than the size reduction it follows.
These controls sit with you, not the platform. Customers are responsible for securing their own environments, such as repos, CI/CD, secrets, and credentials, and for configuring least-privilege access. A registry won't fix a token you baked into a layer.
Local Development With Docker Compose
Use the same Dockerfile for development and production, but stop at an earlier stage for development. Add a development stage that installs all dependencies and runs node --watch or nodemon, then point Compose at that stage. Production keeps building the final stage, so dev tooling never reaches it.
This is a mainstream setup. The 2024 Docker survey findings reported that 36% of 885 developers surveyed by Docker used Node.js in containerized application development. You're not adopting an exotic workflow by developing this way.
The Lines That Matter in Compose
Set target: development under build so Compose builds the right stage. Then handle the two mounts that make containerized development workable.
- Bind mount the project to /app. Your editor writes to the host, the container sees the change immediately, and the watcher restarts the process.
- Anonymous volume on /app/node_modules. Without it, the bind mount shadows the container's installed modules with your host directory. The volume protects the Linux-built modules inside the container.
- Port mapping for app and debugger. Publish the app port, plus
9229when you start Node with--inspect, so Chrome DevTools or your IDE can attach.
The node_modules volume deserves emphasis because skipping it produces confusing errors. Modules installed on macOS or Windows can contain binaries built for that operating system. Copied into a Linux container, a native module fails to load with a message about an invalid ELF header, and the fix looks like a dependency bug when it's really a mount problem.
Mount check: If Node complains about a native module built for a different platform, look at your volumes before you touch your dependencies.
Wait for Dependencies Properly
Add a Postgres service with a healthcheck, using pg_isready as the test command. Then set depends_on with condition: service_healthy on the app service. Plain depends_on only waits for the database container to start, not for Postgres to accept connections, so the app crashes on its first query and restarts until the timing works out.
Pass local configuration with env_file at runtime. Values stay on the developer's machine and out of the image, matching how staging and production inject configuration later. Commit a .env.example with empty values so new teammates know which variables exist.
One failure to expect. A developer runs npm install on the host, then the bind mount carries host-built modules into the container on a path the volume doesn't protect. Install inside the container with docker compose exec app npm install instead, and the modules match the environment that runs them.
Building and Promoting Images in CI/CD
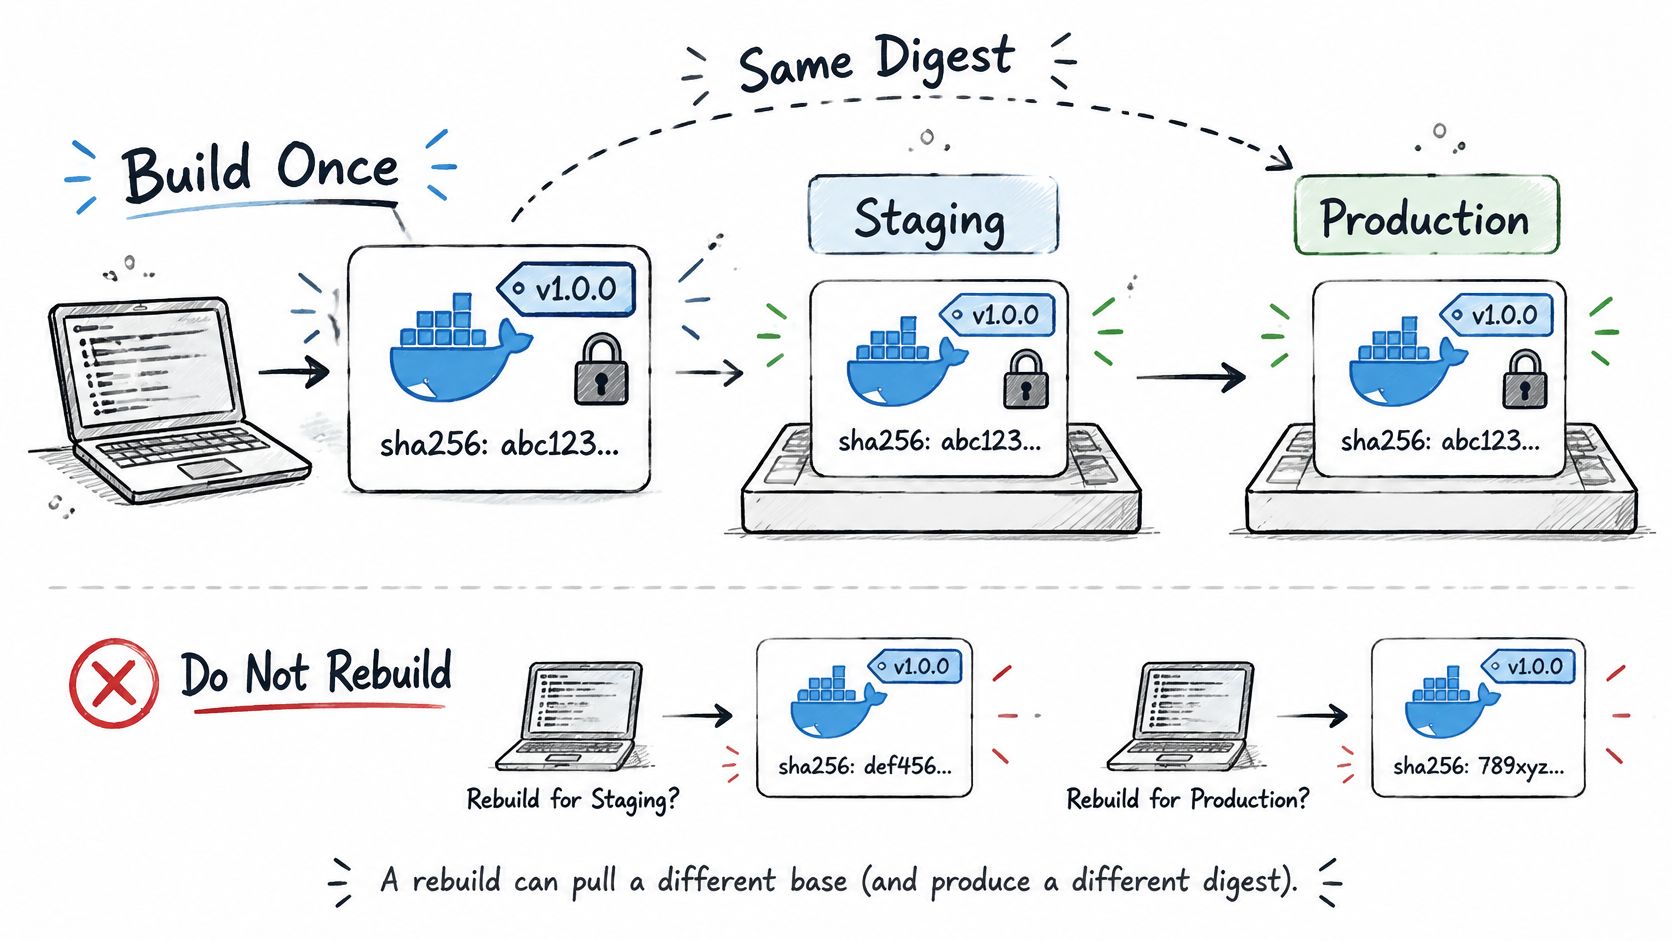
Build once, then promote the same digest through staging and production. Rebuilding per environment sounds harmless and isn't. A second build can pull a different base, resolve a different dependency state, or use a different cache, so the artifact you tested isn't the artifact you ship.
Run the Pipeline in This Order
- Check out the code and set up Buildx. Buildx gives you BuildKit features, including secret mounts and cache export.
- Build both stages with a shared cache. Use a registry cache or the GitHub Actions cache so unchanged layers are reused across runs instead of rebuilding on a cold runner.
- Run the test suite inside the built image. Testing the artifact catches a module that's missing from the runtime stage. Testing the source tree doesn't.
- Scan the image. Apply the scanning gate from your hardening policy and fail the job on critical findings.
- Tag with the git commit SHA and push. Record the resulting digest, because that's what deployment will reference.
A pipeline shaped like this depends on sound CI/CD pipeline security, since the pipeline holds the credentials that push to your registry.
Why the Commit SHA Beats Latest
A tag such as latest tells you nothing a week later. It points at whatever was pushed most recently, and two environments can hold different images under the same name. Debugging becomes guesswork about which build a container came from.
A commit SHA tag connects a running container to an exact commit. You can open that commit, read the diff, and rebuild the same source. Combine it with deployment by digest and promotion becomes a copy of a reference, not a new build. Staging approves a digest, production receives that digest, and there's no drift in between.
Configure at Runtime, Not Build Time
Because one image serves every environment, environment-specific values can't be baked in. Inject configuration through environment variables or a secrets manager when the container starts. Send logs to stdout and stderr so the platform collects them, rather than writing files inside a container that may be read-only.
Set memory and CPU limits per environment, and keep writable paths explicit so a read-only filesystem doesn't break an upload or cache directory by surprise. When a base image update arrives, let it land as its own pull request with its own build and digest. Reviewers see the change, staging validates it, and promotion follows the same path as any code change.
Run Four Failure Tests Before Every Release
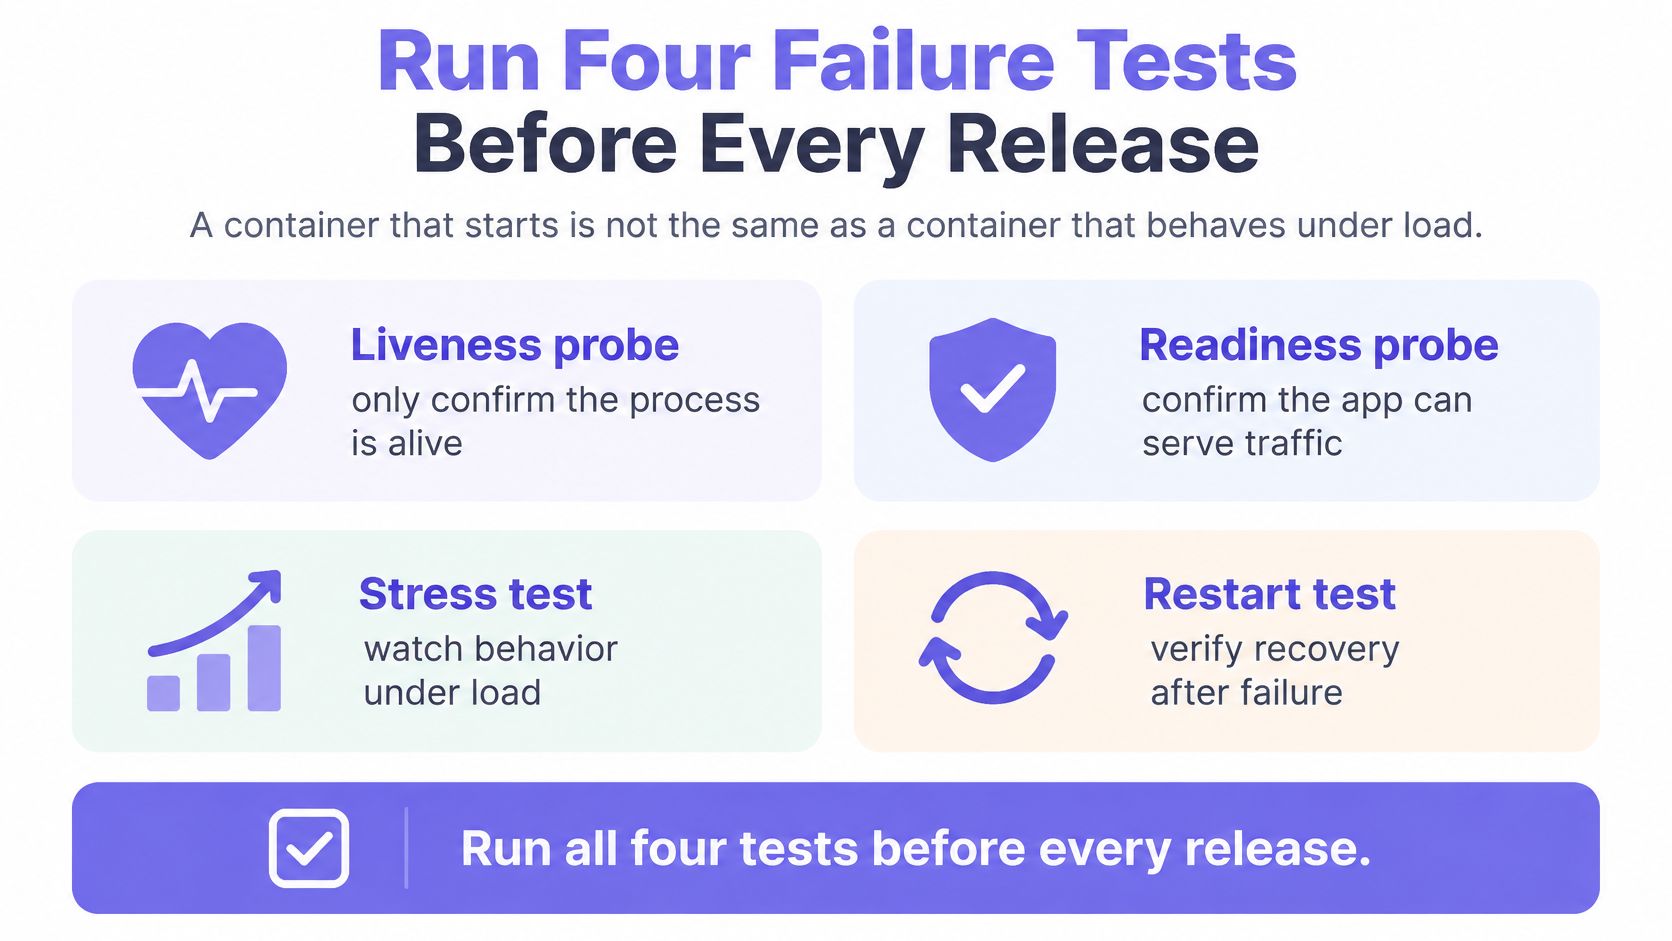
A container that starts isn't a container that behaves. Rollouts, scaling events, and dependency failures are where production incidents happen, and a basic startup check tells you nothing about any of them. Guidance on Node.js Docker best practices makes the same point. A production-ready container must distinguish liveness from readiness, and it needs graceful shutdown that stops accepting traffic, drains connections, and exits within the termination window.
Separate Liveness From Readiness
Liveness answers one question. Is the process alive enough that restarting it would help? Keep it cheap, with no database call and no downstream request. Readiness answers a different question. Can this instance serve traffic right now, which depends on the database or queue being reachable?
Mixing them up causes real damage. If readiness logic sits in the liveness check, a database outage makes every healthy Node.js process fail liveness, the orchestrator restarts all of them, and the restart storm hits the recovering database with a wave of new connections. A downstream problem becomes a full outage.
| Test | How to trigger it | Pass condition | If it fails |
|---|---|---|---|
| Dependency outage | Stop the database container | Readiness fails, liveness stays up, no restart loop | Block release until the readiness check covers the dependency |
| Rolling replacement | Deploy a new revision under load | Traffic moves only after readiness passes | Block release and review probe settings |
| SIGTERM during a request | Send SIGTERM while a slow request is in flight | Request completes, process exits within the termination window | Add a shutdown handler and drain logic before release |
| Delayed startup | Add a 20-second delay to boot | Startup probe holds the container out of rotation until ready | Extend the startup probe window |
Each row is a scenario you can run in staging with plain tooling, and each failure condition names the fix the team owes before the next release.
Handle the Termination Signal
Register a handler with process.on('SIGTERM'), call server.close() so the server stops accepting new connections, and let in-flight requests finish. Close database pools and queue consumers after the server drains, then exit. Kubernetes gives you 30 seconds by default before it sends SIGKILL, so set your own timeout inside that window and force an exit if draining stalls.
Watch for keep-alive connections during this test. An idle keep-alive socket can hold server.close() open indefinitely, so track connections and destroy idle ones on shutdown. The SIGTERM test in the table is how you find that before a rollout does.
Workload fit decides whether these tests are enough. Long-lived connections and WebSockets need a platform that supports persistent connections and gives you control over draining. Bursty, stateless APIs fit autoscaled or serverless runtimes comfortably. Containerizing the app doesn't change that distinction, it just makes you confront it.
Make each failure consequential. A failed test blocks promotion, and the team records which policy changes as a result, whether that's a probe setting, a shutdown timeout, or a readiness dependency. A test everyone ignores is just documentation.
If you're tightening Docker for Node.js across several services, DevArmor applies the policies your team defines to every pull request through Policy-as-Code enforcement, with optional merge blocking, so reviews stop depending on memory. It keeps that security context current as repositories and tickets change, which suits regulated teams that need an audit trail for every runtime they ship. Visit DevArmor to see how continuous threat modeling and Policy-as-Code enforcement fit into the workflow you already use.
Table of Contents
Subscribe


